After some research on the Internet and talking to fellow hams, the BigIR from SteppIR Antennas seemed to be a good candidate to fill my antenna needs. BigIR is a vertical antenna with a very unique design feature - the actual antenna element is made of copper-beryllium alloy tape and it is driven by stepper motor inside a fiberglass tubes. This antenna can change its physical length and can be tuned to be a resonant 1/4 ( or 3/4 on some bands) wavelength vertical on any frequency from 40 meters (80 meters with the optional coil) up to the 6 meters band. The stepper motor in the antenna element housing (EHU) is powered by a small microprocessor-based controller, remotely located in the shack. The antenna controller sends pulses to the stepper motor via 4 wire control cable to extend or retract the antenna element, tuning it to a specific frequency.
On paper, it sounded like the perfect solution - a classic 1/4 wavelength resonant vertical antenna on *EVERY HF HAM BAND* (except 160 meters) plus other frequencies for general coverage receivers and SWL - no lossy traps, no multiple resonant elements making the antenna to look like a Christmas tree, no "CW only" (or "SSB only") sub-band optimized antennas.
At the end of February, 2007 I placed an order with SteppIR for "the BigIR antenna with N connector and the optional computer interface". The demand for SteppIR antennas is pretty huge. In fact it is so big that they can't manufacture the antennas quickly enough to meet the demand. SteppIR are notorious with their lengthy lead times and I mean LENGTHY! When I placed the order I was told that it was going to take "at least 8 to 10 weeks" before the antenna ships out! I was also told by SteppIR that they are going to charge my credit card just before the antenna ships out and I have "no option of canceling the order". I was not very excited by this last part but went ahead anyway and placed my order. I must note - the antenna is not cheap by any means - it costs at least twice as much as other high-end multi-band verticals but I think it is worth the price!
I decided to mount the antenna at ground level - I was looking for a low-profile antenna installation since I was going to put it in my back yard and didn't want to look at the radial wires hanging in the air all the time. I also have enough space to put a fairly good buried radial system. I didn't like the idea of elevated mount for several reasons - the radials had to be resonant and at least 2 or 3 per band - such approach was going to create a huge spider-web with many wires strung high in the air (20-some radials to cover all bands) , guy wires, the antenna mast itself, the coaxial feed line, etc. - not what I call "stealth installation". In an elevated mount the angle of the radials also requires careful adjustment to get the feed point impedance correct. Lastly, if I did the elevated installation I was going to turn my back yard into an "obstacle course" - not a fun thing when navigating with a lawn mower and my wife was not going to be very trilled by the view either. In other words - too much fuss, to many cons and too few pros for the elevated mount approach.
I decided on a location for the antenna site which is almost 100 feet (~30 meters) away from my shack, towards the middle of my yard so I can have enough space to spread the buried radial system.
My shopping list included 100 feet of the grey PVC electrical conduit tubes with 1.5 inch diameter (10 tubes, 10 feet each), some couplers and 45 degree elbows, PVC glue/primer for the conduit, 2 x 100 feet of nylon rope, an extra roll of the all-weather electrical tape and extra roll of the self-fusing silicone tape, 100 feet of Times Microwave LMR-600 coaxial cable and 2 male N connectors (clamp type) for the LMR-600 . I also ordered 100 feet of the 12 wire control cable from SteppIR . Normally SteppIR recommends 4+4 cable but I wanted to be ready for future upgrades.
The 100 feet 12 wire (AWG #22) foil shielded control cable was delivered after about a week from ordering with SteppIR along with the 2 connectors - one for the antenna side (4 pin weather proof) and one DB25 controller connector. The package included also 4 wire lugs for the 80 meter coil and wiring diagram / instruction sheet.
I also ordered the Radial Plate from DX Engineering along with some stainless steel hardware for the plate and the V-type pole clamp. My decision to go with the LMR-600 coaxial was not a difficult one - I was installing an expensive antenna 100 feet away from my shack and didn't want any unnecessary losses in the cable. I also have future plans to install VHF/UHF vertical nearby and I might use the same run of cable with a coaxial relay for both antennas. This was also the motivation behind the 12 wire control cable - 4 wires for the antenna motor, 4 wires for the 80 meter optional loading coil motor and spare wires for coaxial relay and backup lines.
In the beginning of April I received an email from UPS with tracking information concerning 2 packages shipped to my address. Quick check online with my credit card confirmed the suspicion - my BigIR was on the way - only 5 weeks after I placed my order! Not bad at all!
(Click on the thumbnails for high-resolution image. Use the BACK button of your web browser to go back to the HOME page)
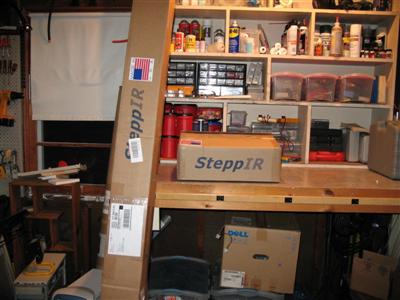
Here are the two boxes in my garage.
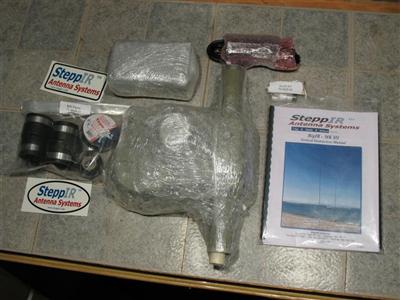
The content of the smaller box. Everything was well packed in plastic foil and bubble-wrap.
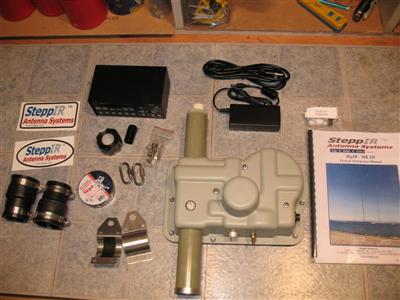
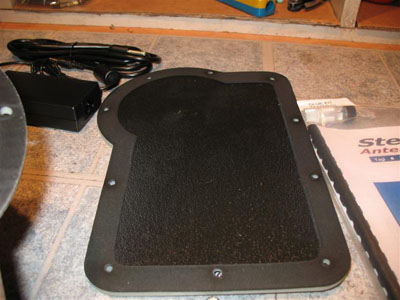
On this picture one can see the black antenna control box, power supply, PVC glue kit, weather resistant electrical tape, self-fusing silicone tape, rubber boots, SteppIR stickers, the guy bracket and hardware, manuals and the most important thing - the EHU or Element Housing Unit
.
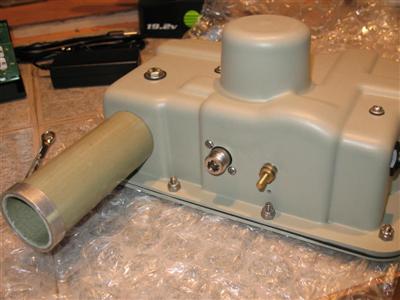
Here is a different view of the EHU. The connector on the bottom is a SO-239 (UHF) coaxial connector, brass screw (next to the SO-239) is used as connecting point for the ground radials and the black connector on the right side is for the control cable.
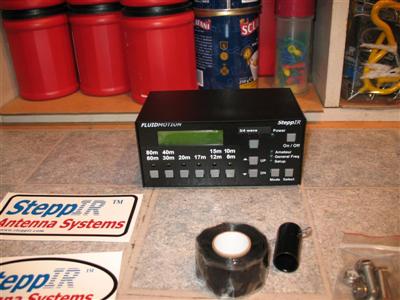
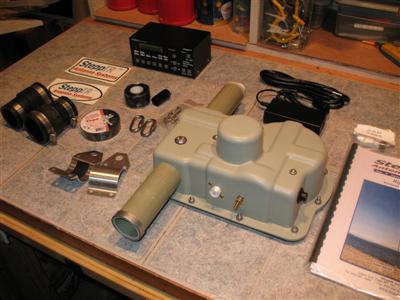
This is a close-up of the Antenna controller. The black thing next to the silicone tape is a special cap for the tip of the antenna. This cap allows for air to go in and out of the antenna and also prevents water from getting in.
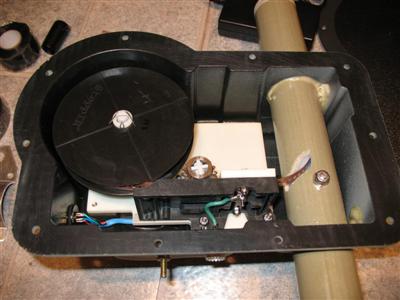
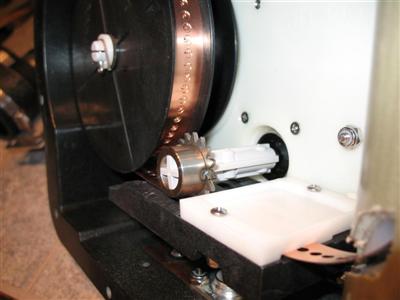
I think I have a psychological condition (on genetic level :-). I need to open every piece of equipment I can put my hands on. I must see how it is built, how it works and sometimes just to make sure that the manufacturer did not forget any tools or loose screws inside :-). So here the cover of the EHU is off.

On this picture one can see the spool with the copper-beryllium tape (it is the most expensive part - the actual antenna element), the plastic shaft extension of the stepper motor with the sprocket and the back of the UHF connector.
I ordered my antenna with N type connector but SteppiR Antennas shipped me a unit with UHF type connector by mistake. I didn't want to send the EHU back for replacement so I decided to change the connector myself.

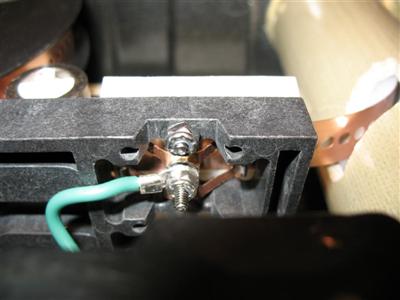
Another view of the EHU. The green wire connects the center pin of the antenna connector to the "brush" contact assembly.
The "brush" has 4 contact points touching the antenna element tape.
. 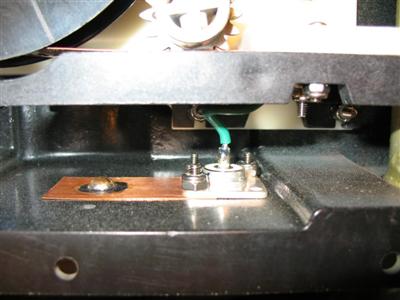
The UHF (SO-239) connector. Copper strip is connecting the antenna connector to the ground (radials) connection point.
Spool with perforated copper-beryllium tape and the steel sprocket driving the tape. The "brush" contact is underneath the white nylon block.
The stepper motor is to the right behind the vertical white plate.
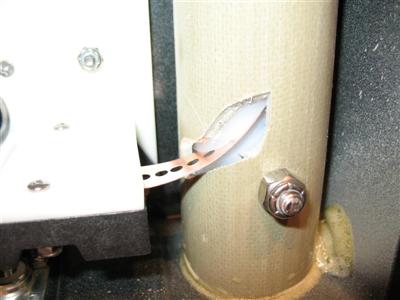
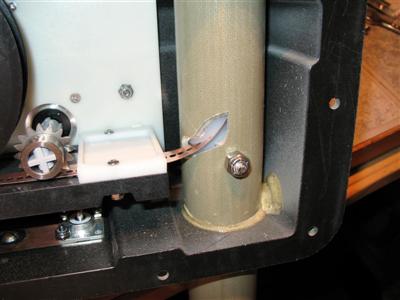
The copper-beryllium tape enters the fiber-glass pole section thru this opening. There is a nylon tape guide inserted in the fiber-glass pole section.
.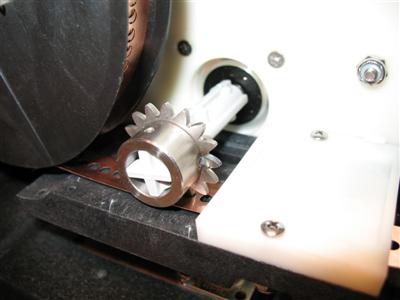
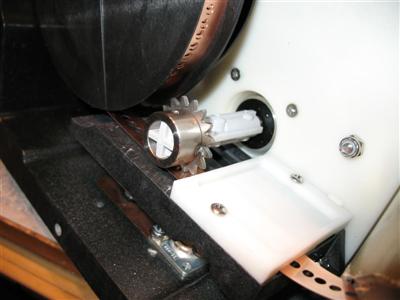
The steel sprocket and the perforated antenna element. Note the plastic shaft extension - the antenna element is electrically isolated from the stepper motor.
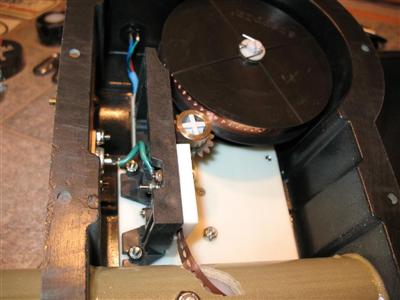
On this picture the control cable connector with the blue wire going to the stepper motor is visible near the top of the image.
The cover of the EHU with the foam gasket. (I might try to cut out such cover from transparent Plexiglas at some point :)) It would be great for inspecting the internal mechanics and the proper operation of the EHU and it will look cool too! )
View of the EHU with the newly installed N connector and the brass screw used as connection point for the ground radials.
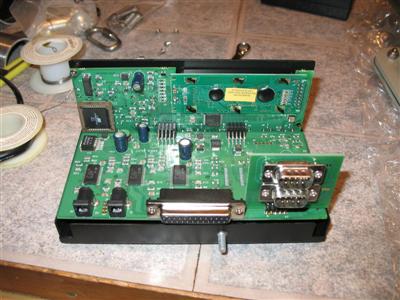
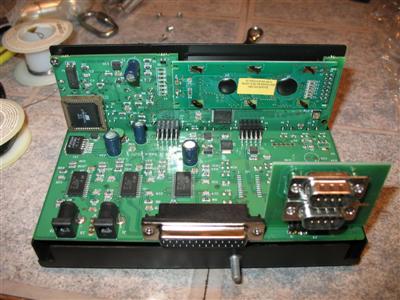
The antenna controller. The vertical board on the right is the optional computer interface board. It is soldered to the main board. This option allows the antenna to be controlled with PC. The chip in the brown socket is the PIC. The display board is visible at the top-right.
The 3 chips in the middle of the main board are the stepper motor drivers. There are also 2 power connectors - for primary and auxiliary power supply.
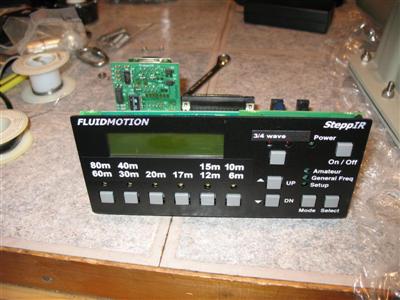
The front of the antenna controller with the optional computer interface visible at the top-left.
for questions and comments about this article - ae1sAT arrl.net or visit blog.kotarak.net